Introduction
Google announced the phase-out of Less Secure Apps (LSA) authentication, affecting users who use Gmail to receive their bounce notifications. Connecting to a Gmail account must now be done using Google OAuth. This guide will show you how to configure Google OAuth to access your Gmail mailbox.
Step 1: Create a New Project
- Go to the Google Cloud Console:
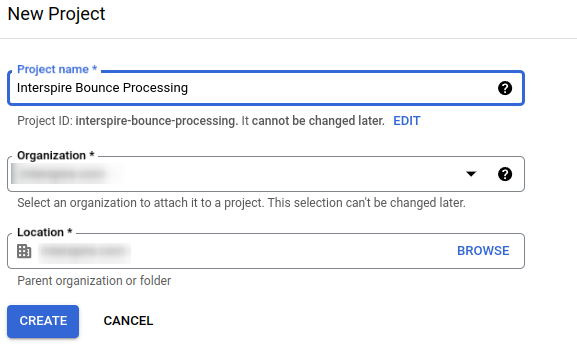
Open Google Cloud Console (https://console.cloud.google.com/). - Create a New Project:
- Click on the project drop-down in the top left corner.
- Select New Project.

- Enter a project name and select a billing account if required.

- Click Create.
Step 2: Enable Gmail API
- Select Your Project:
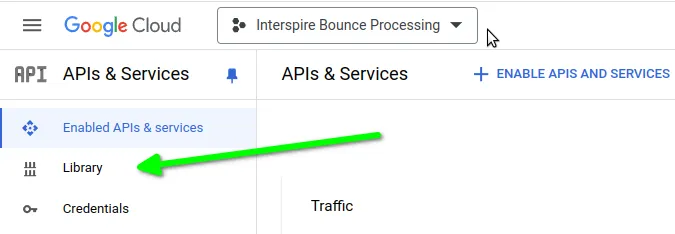
Ensure your new project is selected in the project drop-down. - Navigate to APIs & Services:
- Click on the Navigation menu (≡) in the top left.
- Go to APIs & Services > Library.

- Enable Gmail API:
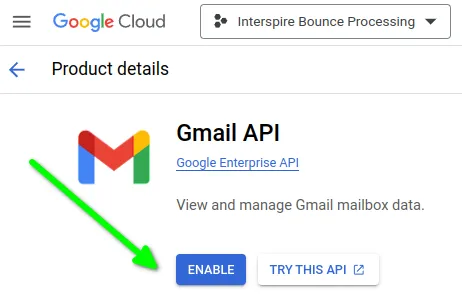
- Search for “Gmail API”.
- Click on the Gmail API result.

- Click Enable.

Step 3: Create OAuth Consent Screen
- Navigate to OAuth Consent Screen:
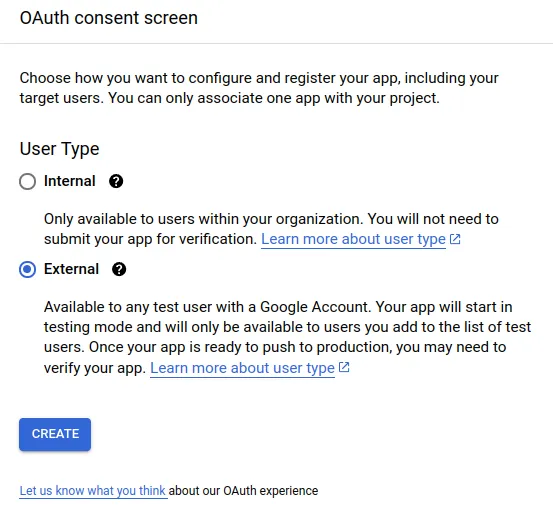
- Go to APIs & Services > OAuth consent screen.
- Configure the Consent Screen:
- Select External if you are not part of an organization.

- Click Create.
- Select External if you are not part of an organization.
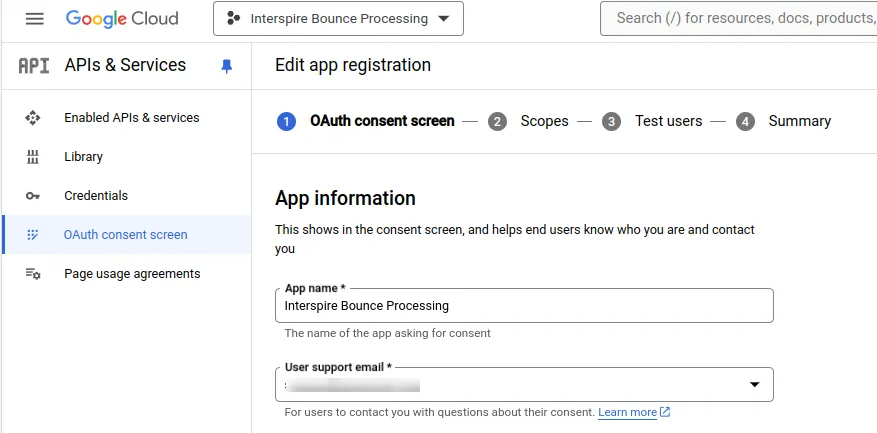
- Fill Out App Information:
- Enter the App name, User support email, and other required fields.

- Further down the same page, enter the Developer contact information

- Click Save and continue.
- Enter the App name, User support email, and other required fields.
Step 4: Configure OAuth Consent Screen Scopes
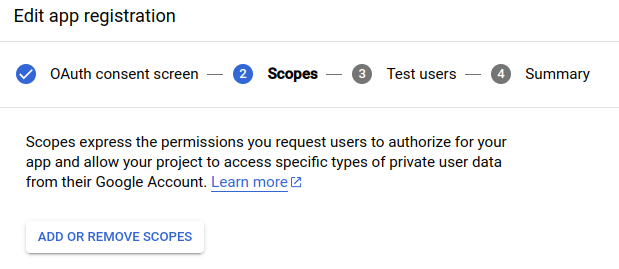
- On the next screen Add Scopes:
- Under the Scopes section, click Add or Remove Scopes.

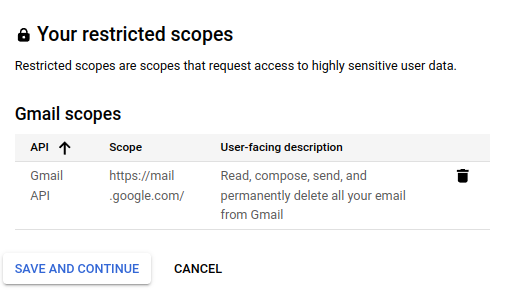
- Filter for Gmail API

- Add the necessary Gmail API scopes, e.g.,
https://www.googleapis.com/auth/gmail.readonlyif you are not going to delete the messages or the one below if you will be deleting messages
- Click Save and continue.
- Under the Scopes section, click Add or Remove Scopes.
Step 5: Add Test Users
Depending on the scopes you choose, some may be restricted. Since the application will not be published and will stay in ‘Testing’ status, only authorized users will be able to connect to it.
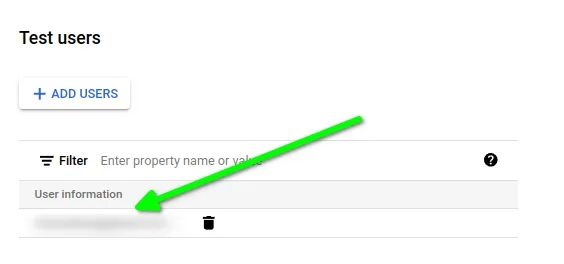
- Add Test users

- Click on Add
- Then Click on Save and Continue
Step 6: Create OAuth Credentials
- Navigate to Credentials:
- Go to APIs & Services > Credentials.
- Create OAuth Client ID:
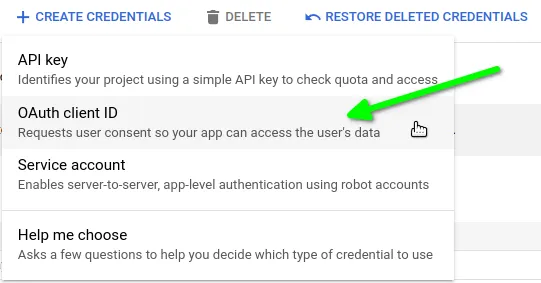
- Click Create Credentials
- and select OAuth client ID

- Configure the OAuth Consent Screen:
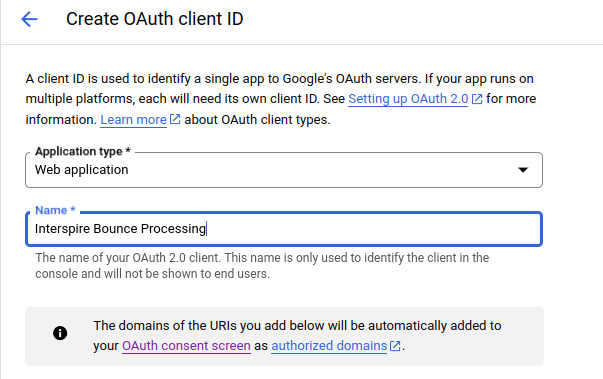
- Select the application type, e.g., Web application.
- Enter a name for your OAuth client.

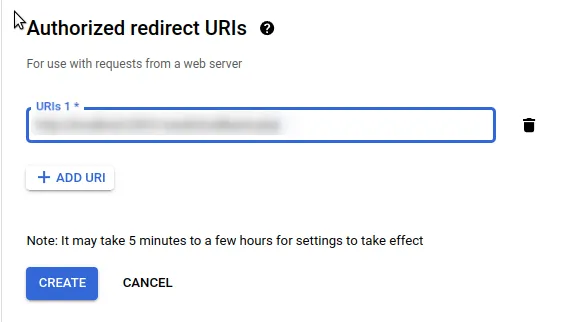
- From your Interspire screen, retreive the OAuth callback URL

- Add it to Authorized redirect URIs:

- Generate Client ID and Secret:
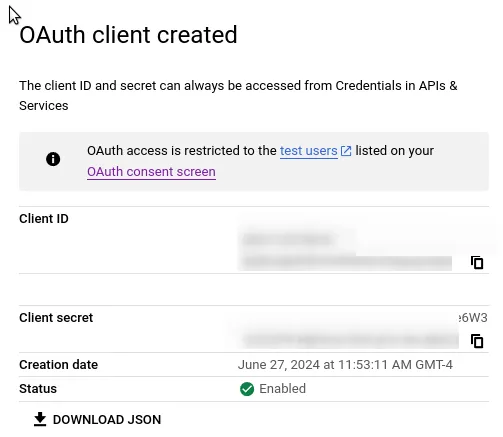
- Click Create.
- Note down the Client ID and Client Secret for later use.

Step 7: Enter the OAuth 2.0 Credentials in Interspire Email Marketer
- Enter the email addess that will receive the bounces:

- Enter the Credentials in Interspire Email Marketer:

- Click on the Google OAuth Sign-In button
- Go through the Authentication Screens
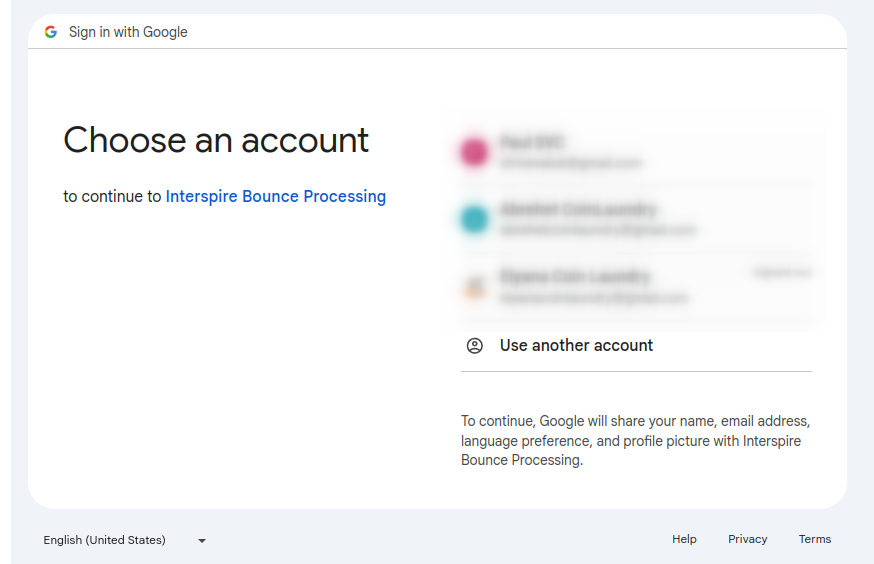
- Select the account to use for authentication

- Complete the Sign-in process
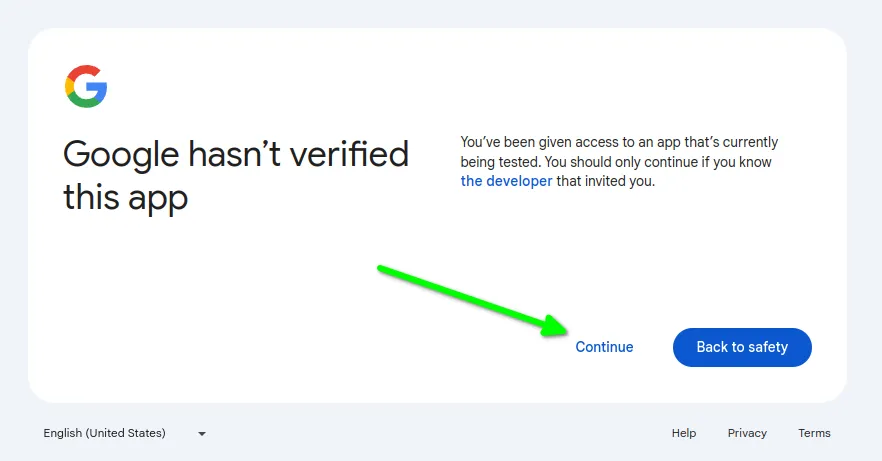
- Click on Continue as the application is in ‘Testing Mode’

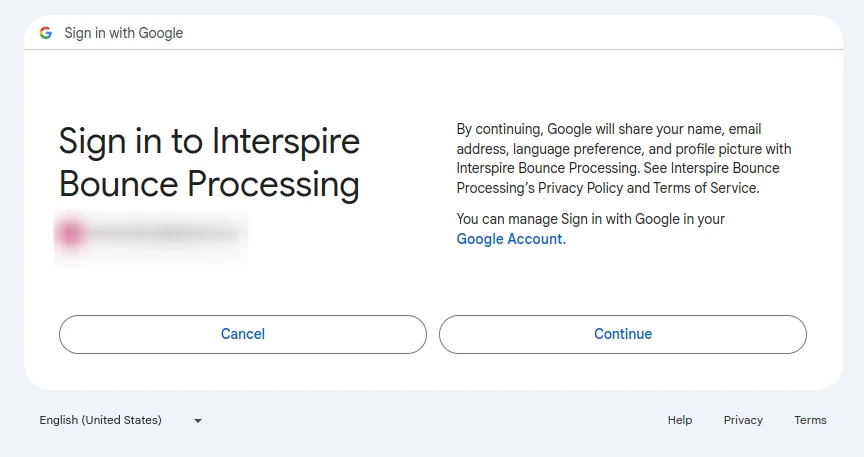
- Click Continue to accept to sign-in

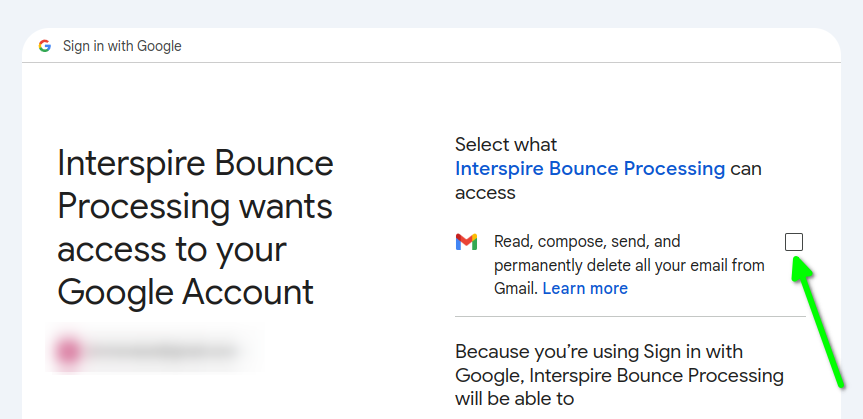
- Select the Check box to allow access to Gmail

- Click Continue
- Select the account to use for authentication
- Your instance of Interspire is now Authenticated to your Gmail Account

Conclusion
Configuring Google OAuth can be a little involved, in particular that the source documentation is rather confusing. Hopefully the step-by-step guide above will have allowed you to configure Google OAuth to access Gmail for bounce processing in conjunction with Interspire Email Marketer.


